I've discovered a fun and simple way to make my own beautiful embellishments. You can also use the same technique to make window clings. All you need is ModPodge, a little food coloring, glitter or sparkle fabric paint (optional), and a plastic candy mold. Be sure to use the plastic one as ModPodge will come off it more easily when the ModPodge is completely dry.
1. Squirt a little ModPodge on a piece of plastic wrap. Choose the food coloring you like and add one or two drops. Mix with a toothpick. Add glitter or a little sparkle fabric paint if desired.
2. Using a toothpick or other small item, transfer the colored ModPodge to the candy mold and spread a thin, even layer in the bottom of the mold. If you want an embellishment, you can make the layer a little thicker. If you want a window cling, make it a little thinner. The thinner you make it, though, the easier it will be for it to tear when you remove it from the mold. On the other hand, the thicker you make it, the longer it will take to dry.
3. Allow to dry completely -- anywhere from 4 to 7 days, or longer depending on the humidity. It is important to allow it to dry completely, or you will not be able able to remove it from the mold without tearing it.
4. Once it is completely dry, take a knife (I use a paring knife) and gently loosen the edges all around. Be very careful that the knife does not slip and you don't cut yourself. After the edges are loosened, gently and slowly peel the ModPodge creation off your mold.
Now it is ready to use. You can stick it to your window like a window cling or glue it onto another project like a card!
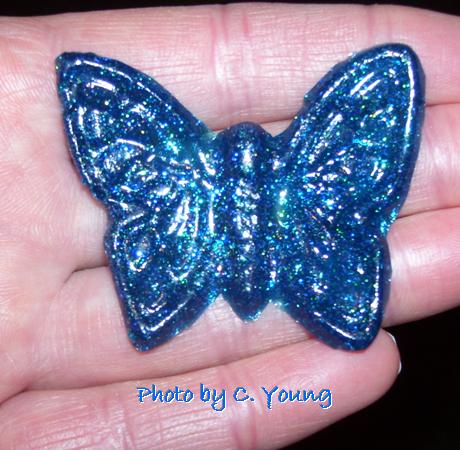
Here is a picture of the Mod Podge embellishment I made -- a blue sparkly butterfly.
1. Squirt a little ModPodge on a piece of plastic wrap. Choose the food coloring you like and add one or two drops. Mix with a toothpick. Add glitter or a little sparkle fabric paint if desired.
2. Using a toothpick or other small item, transfer the colored ModPodge to the candy mold and spread a thin, even layer in the bottom of the mold. If you want an embellishment, you can make the layer a little thicker. If you want a window cling, make it a little thinner. The thinner you make it, though, the easier it will be for it to tear when you remove it from the mold. On the other hand, the thicker you make it, the longer it will take to dry.
3. Allow to dry completely -- anywhere from 4 to 7 days, or longer depending on the humidity. It is important to allow it to dry completely, or you will not be able able to remove it from the mold without tearing it.
4. Once it is completely dry, take a knife (I use a paring knife) and gently loosen the edges all around. Be very careful that the knife does not slip and you don't cut yourself. After the edges are loosened, gently and slowly peel the ModPodge creation off your mold.
Now it is ready to use. You can stick it to your window like a window cling or glue it onto another project like a card!
Here is a picture of the Mod Podge embellishment I made -- a blue sparkly butterfly.


 RSS Feed