On Friday, I finally finished the
Butterfly Purse
This was challenging as I had not done a project like this before. And this is the first time I made a lined bag of any kind.
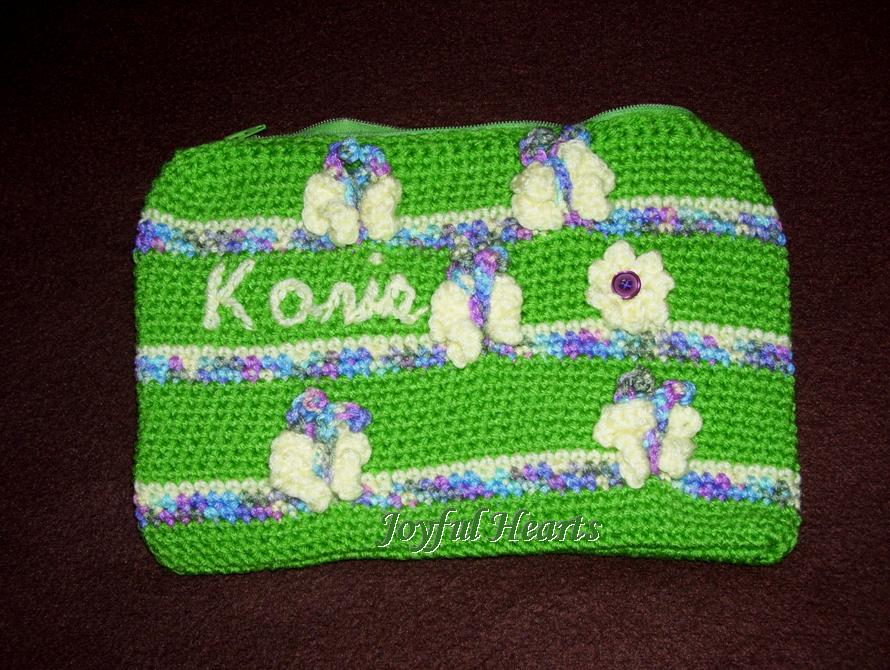
First I made the main part of the purse, which was about 10 inches wide by 7 or 8 inches high. The butterflies were part of the stitch, but I added the flowers. Mom stitched on the name using a chain stitch.
The purse was made from the top down. I started at the zipper and worked toward the bottom. When I got it the desired length, I unzipped the zipper (very important) and turned the purse inside out. Also turned my work so that I was crocheting the opposite direction and closed the bottom of the purse by single crocheting both sides together. Then the purse was turned right side out.
Lining
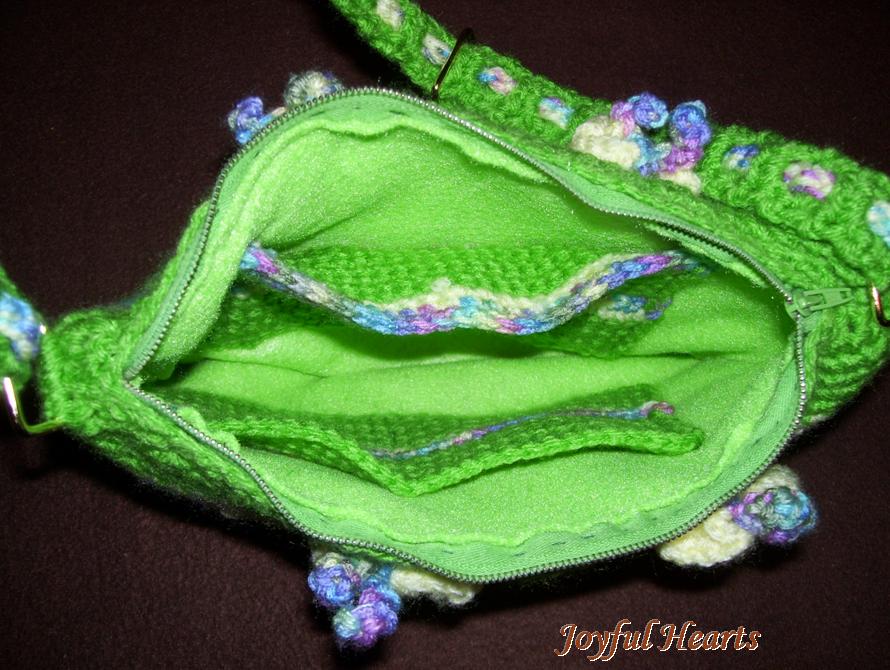
The next step was to do the lining. I've seen several different ways to do it, but this video had the easiest technique I found, at least for me. Since the purse has a zipper, I sewed the lining to the zipper on the inside, making sure to go all the way through and sewing to both zipper and yarn. With a little care, the thread can be pretty much invisible on the outside, though it will show on the inside.
After the lining was put in, the pockets were sewed on. One side had a single pocket. The other side had two smaller pockets. To make the pockets more sturdy, I sewed the pockets to the lining but also made sure to go through the felt and catch a little of the yarn as well with each stitch. This was a little tricky, and I ended up redoing part of each pocket as I caught some yarn on the edge of the purse and made the side pucker. Thankful for picks and sharp pointed scissors. :-) Here is a picture of the lined purse with pockets.
The Strap
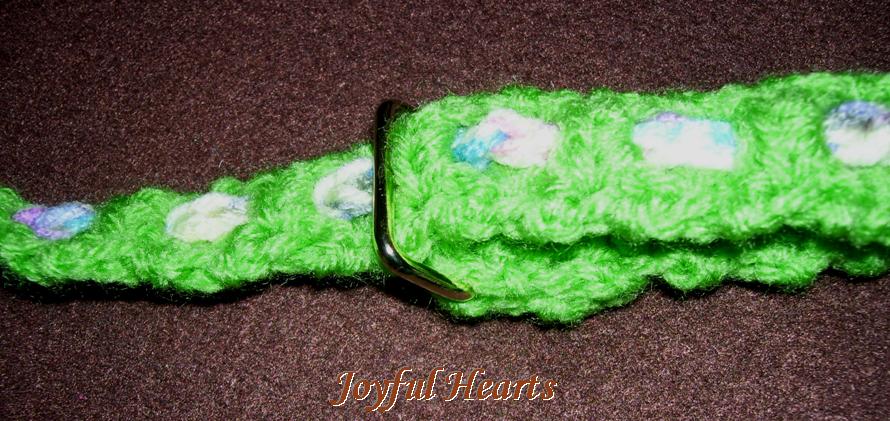
One request with this order was for an adjustable strap. This wasn't as difficult as I thought, but I don't know how to explain what to do to make it. Mom helped me with this step. Three rectangular rings were used in the process.
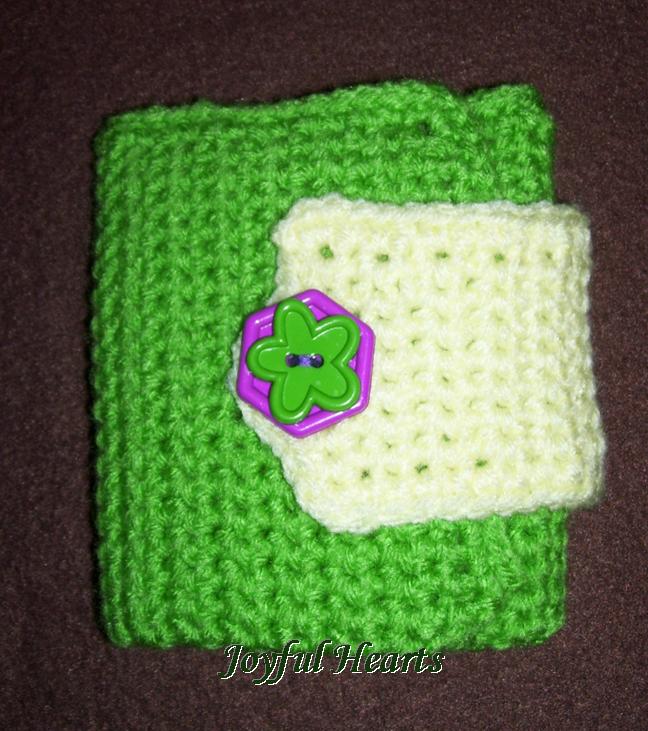
Wallet
Another request for this order was a crocheted wallet. An old leather wallet made a good pattern. It helped in knowing how long and high to make it, where to make the folds, and how to make the inner pocket. The crocheted version shown here has only one pocket. A little plastic coin purse will be included. That was easier than making a little zippered pocket. :-)
Colors used in the wallet were the same as those used in the purse -- the spring green and pale yellow. It was Mom's idea to double up the button. Hence a fuchsia pentagon shaped button on the bottom with a green flower button on top. I glued these together first so that the holes would stay aligned while I sewed and then sewed it on with purple thread.

The angle of the picture makes the crocheted wallet look longer and larger than the black one,
but they were actually almost the same size.
but they were actually almost the same size.
The inside of the wallet. You can see the pocket --
goes the length of the inside but comes about a half inch from the top.
goes the length of the inside but comes about a half inch from the top.
 Wallet folded and closed |  Double button |
So was completed this challenging project. It definitely wasn't perfect, but it was a good way to learn how to do some new things. Hope you enjoyed!
Are you trying a new or special project? Tell me about it in the comments.


 RSS Feed