Hey, everyone! Thanks for stopping by!
I'm a bit late with this craft roundup because of technical problems uploading pictures to the blog. But, I'll give it a try today and we'll see how things go.
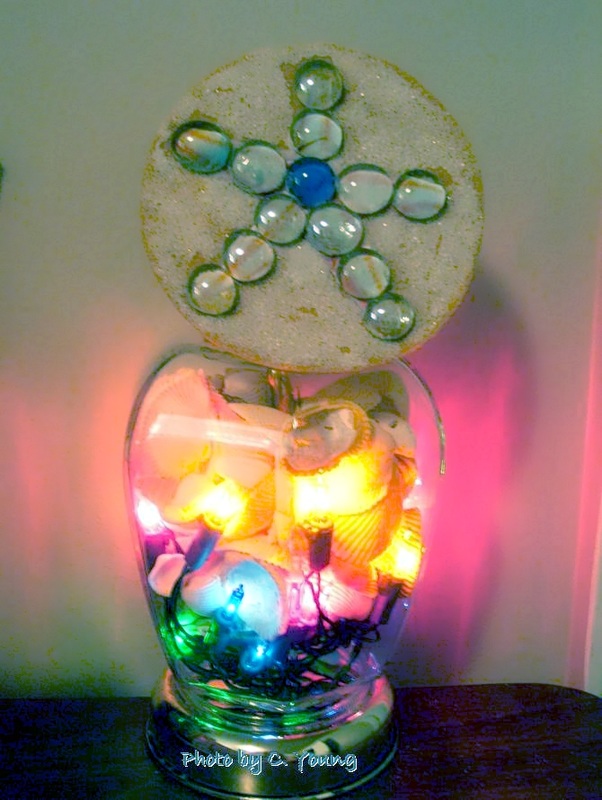
Shell Colored Lights Lamp
My bedside lamp finally gave up the ghost. It was old and well used. The glass base and shells were pretty though, and they needed a new life. So, they turned into a shell colored lights lamp.
First I unscrewed the base and cut off the power cord. The cord was amazingly easy to cut. Guess it was getting rather old and brittle. Then I enlarged the hole in the metal part of the bottom of the lamp base. This was no easy task. Whatever metal it is made of was not intended to be bent. It actually had to be heated on the stove quite a while before I could bend it with some needle nose pliers.
Once the hole was big enough, I let the metal piece cool. After it cooled, I fed a string of Christmas lights through it. The hole was still quite small, so they had to be fed one light at a time. Then I arranged them among the shells. Was not quite happy with the finished product. When the lights need to be replaced, I think I'll take some of the shells out so they are not so tight in there and then the lights should be easier to work around through the shells. When the lights were in place as good as they could be, I screwed the bottom of the base back on.
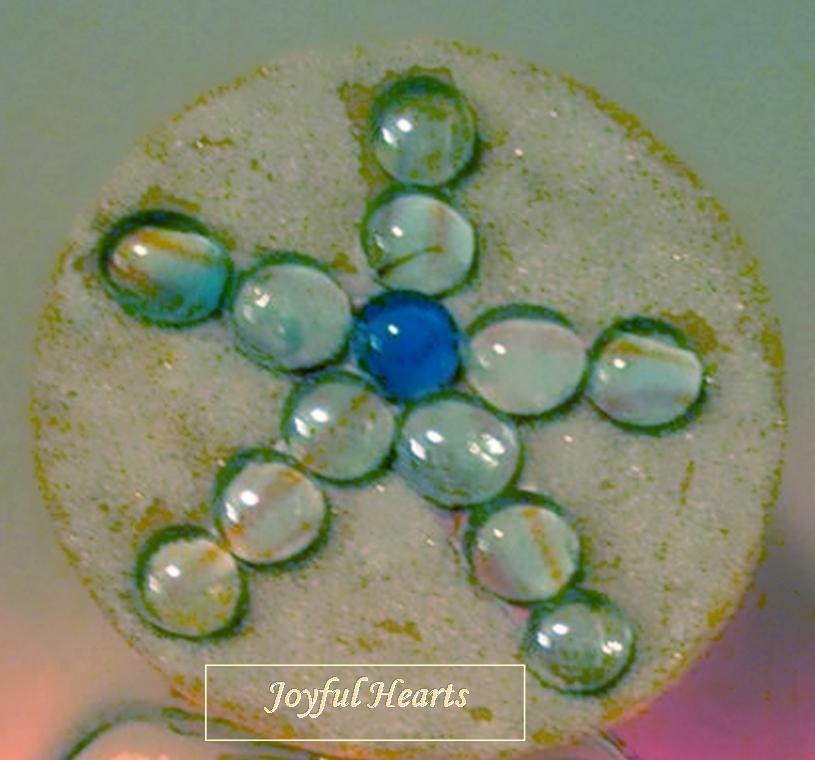
Now, what to do with the top? The switch mechanism wasn't all that pretty. So, I decided to make a star fish decoration to cover it up.
Starfish decoration:
First I took an old CD and covered it on the printed side with a piece of tan felt. Next, I printed out a picture of a starfish and glued it on. When that was dry, I glued on glass gem stones over the shape of the star fish. Finally, I covered any exposed areas of felt with glue and sprinkled on some sand.
After the sand was dry, the CD was turned over. Double sided sticky tape and some wire were added to make a way to attach the decoration to the switch assembly part of the lamp.
I'm a bit late with this craft roundup because of technical problems uploading pictures to the blog. But, I'll give it a try today and we'll see how things go.
Shell Colored Lights Lamp
My bedside lamp finally gave up the ghost. It was old and well used. The glass base and shells were pretty though, and they needed a new life. So, they turned into a shell colored lights lamp.
First I unscrewed the base and cut off the power cord. The cord was amazingly easy to cut. Guess it was getting rather old and brittle. Then I enlarged the hole in the metal part of the bottom of the lamp base. This was no easy task. Whatever metal it is made of was not intended to be bent. It actually had to be heated on the stove quite a while before I could bend it with some needle nose pliers.
Once the hole was big enough, I let the metal piece cool. After it cooled, I fed a string of Christmas lights through it. The hole was still quite small, so they had to be fed one light at a time. Then I arranged them among the shells. Was not quite happy with the finished product. When the lights need to be replaced, I think I'll take some of the shells out so they are not so tight in there and then the lights should be easier to work around through the shells. When the lights were in place as good as they could be, I screwed the bottom of the base back on.
Now, what to do with the top? The switch mechanism wasn't all that pretty. So, I decided to make a star fish decoration to cover it up.
Starfish decoration:
First I took an old CD and covered it on the printed side with a piece of tan felt. Next, I printed out a picture of a starfish and glued it on. When that was dry, I glued on glass gem stones over the shape of the star fish. Finally, I covered any exposed areas of felt with glue and sprinkled on some sand.
After the sand was dry, the CD was turned over. Double sided sticky tape and some wire were added to make a way to attach the decoration to the switch assembly part of the lamp.
Now that the lamp was put together, it was time to test it out. It did look pretty, although it was hard to get all the colored lights to show up in the picture. This will look nice in our fish/sea themed bathroom.
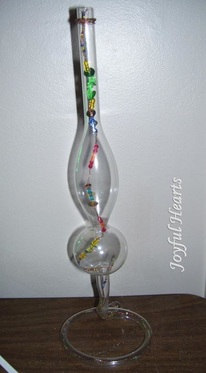
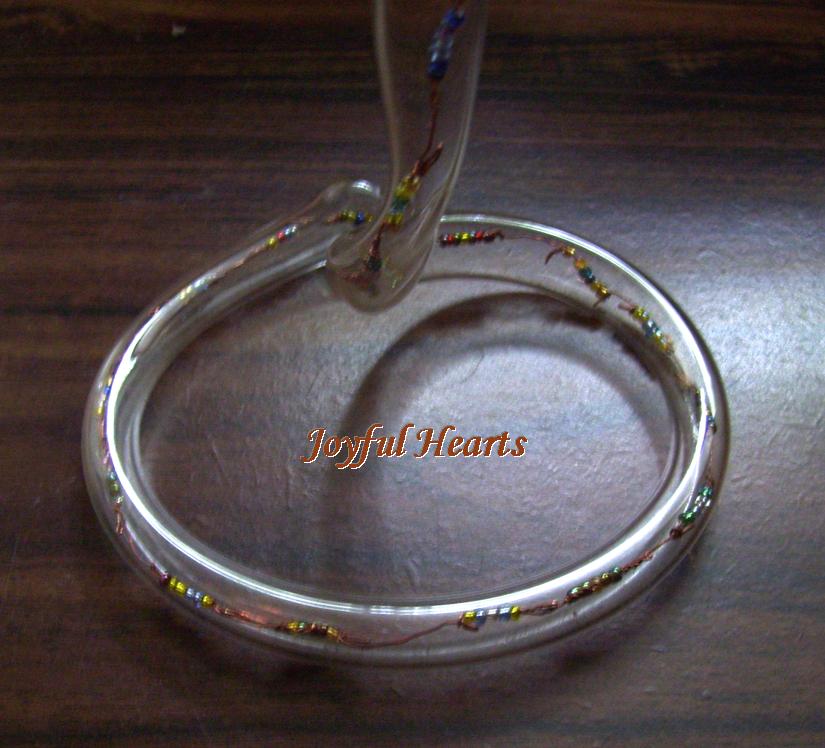
Vase and Beads
This craft was more of an experiment, but it turned out OK. I had this lovely vase that I had gotten from a thrift store and wasn't sure what to do with it. Also had some very thin copper wire which looked just about the right thickness for "stringing" tiny seed beads. So, I strung them on until the wire was long enough to go the length of the vase (although it could have been a little longer).
Next job was to work the beaded wire through the vase. This was harder than I had anticipated. Because the wire was so thin, it would bend when it met resistance instead of following the path through the vase. But, I used a thin dowel rod to encourage it along. With persistence, I finally got it all the way to the bottom. Now it sits on the little rolling cart in front of my window and adds shine and sparkle to the room.
 |  |
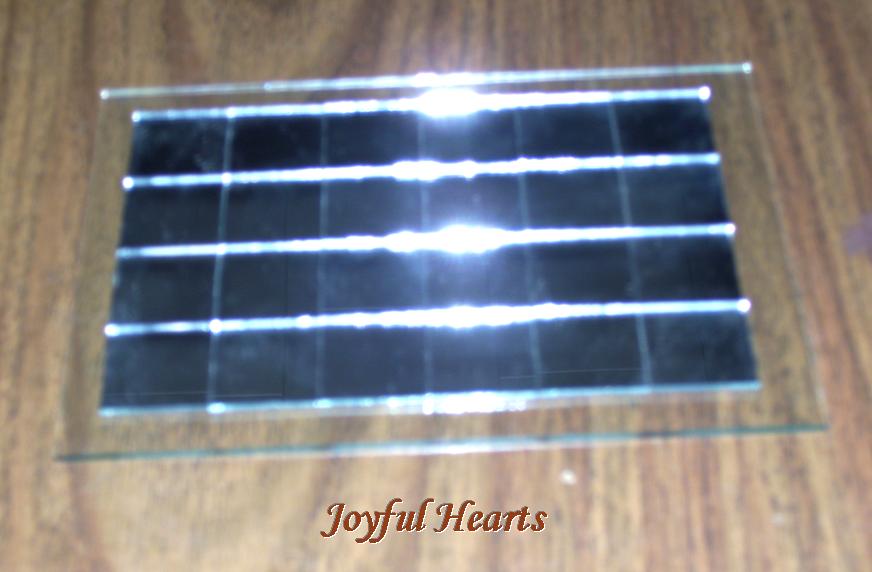
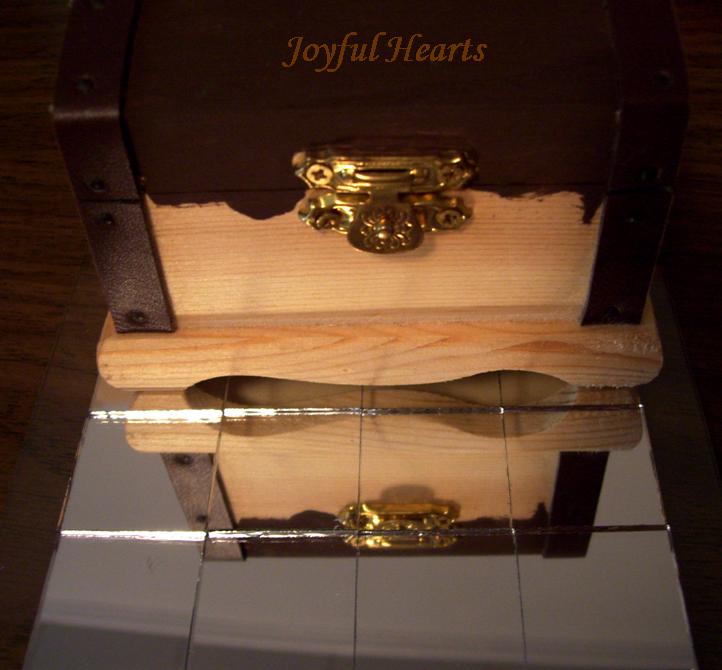
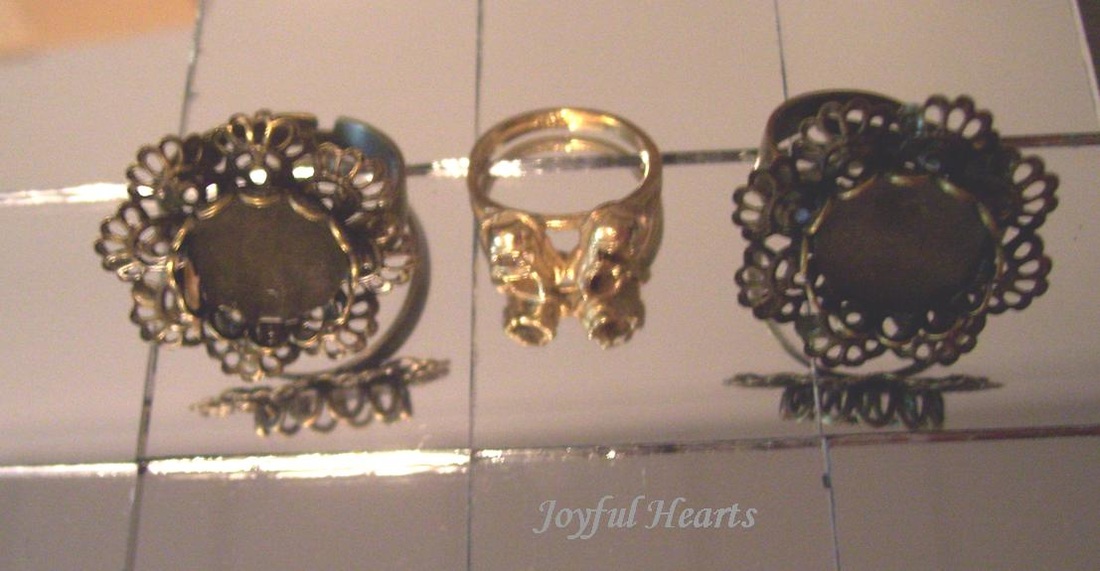
Mirror Tile Mat
These mirror tiles have been sitting in my craft supplies for several years, and I had no idea what to do with them. As I was looking at pictures of crafts on the internet yesterday, an idea came to my mind. How about making a small tiled mirror mat for taking pictures of little craft items that would look good with a reflection?
To make the mat, I first cleaned a small piece of glass that had been taken out of a picture frame. It was just the right size for the 25 mirror tiles. These were arranged as neatly as possible on the glass and then glued to the glass. The glue was allowed to dry overnight. Now the mat is all set for taking pictures. The fun part will be figuring out the best items to take pictures of and the best angle to use to get the right reflections. Here are the results of a couple of tries at picture taking on the mat.
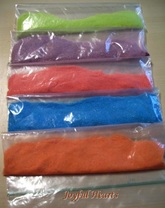
That's it for this craft roundup! Hope to see you again next week. Then I'll share with you what I made with this colored sand.
Have a great week, y'all!


 RSS Feed