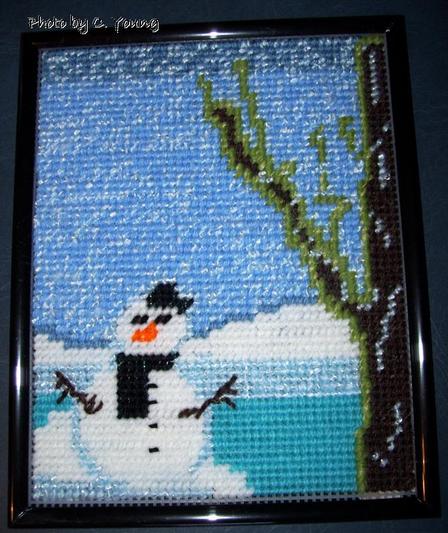
One craft I’ve enjoyed making lately is plastic canvas pictures. To do this, I find a public domain picture with no restrictions on use, print it out on graph paper, trace it on the plastic canvas and then stitch in the right colors to make it. It is a great way to use up yarn scraps. For this snowman/snow scene I actually combined two pictures.
0 Comments
I've discovered a fun and simple way to make my own beautiful embellishments. You can also use the same technique to make window clings. All you need is ModPodge, a little food coloring, glitter or sparkle fabric paint (optional), and a plastic candy mold. Be sure to use the plastic one as ModPodge will come off it more easily when the ModPodge is completely dry.
1. Squirt a little ModPodge on a piece of plastic wrap. Choose the food coloring you like and add one or two drops. Mix with a toothpick. Add glitter or a little sparkle fabric paint if desired. 2. Using a toothpick or other small item, transfer the colored ModPodge to the candy mold and spread a thin, even layer in the bottom of the mold. If you want an embellishment, you can make the layer a little thicker. If you want a window cling, make it a little thinner. The thinner you make it, though, the easier it will be for it to tear when you remove it from the mold. On the other hand, the thicker you make it, the longer it will take to dry. 3. Allow to dry completely -- anywhere from 4 to 7 days, or longer depending on the humidity. It is important to allow it to dry completely, or you will not be able able to remove it from the mold without tearing it. 4. Once it is completely dry, take a knife (I use a paring knife) and gently loosen the edges all around. Be very careful that the knife does not slip and you don't cut yourself. After the edges are loosened, gently and slowly peel the ModPodge creation off your mold. Now it is ready to use. You can stick it to your window like a window cling or glue it onto another project like a card! Here is a picture of the Mod Podge embellishment I made -- a blue sparkly butterfly. This afghan has been in the works for several months. Size is about 70 inches by 80 inches. It is based off the loopy love pattern by Moogly, though I made a couple of changes, especially on the first two rows and added a border. For the border I used the flower edging in this youtube tutorial. This shawl was made for an order. Colors are dark blue, mint blue, and light blue. I used the same stitch as I used in the baby blanket which I tell about below. This stitch made it quick and simple to work up. Price for adult shawl is $35.00 and up. We also have a Facebook page. For the rest of October only, we are offering a deal - $10.00 off the price of a shawl or 30% off other items for those who like and share our Facebook page. The baby blanket was made with the same stitch as the shawl and was based on this youtube tutorial. The tutorial is in Spanish. The lady who did the tutorial recommended using a 2mm hook, but that is smaller than I like to work with, so I used a 6mm hook or a J. I also added a simple single crochet border with two rows of single crochet all the way around. This baby blanket is not for sale as it is for a special friend who just had a baby, but I can make baby blankets to sell. Price for a baby blanket is $20.00 and up. |
Archives
August 2022
Categories
All
Ways to Earn and Save
Try ShopAtHome for cashback when you shop. Visit the site for more info.
Southern Savers is a great place to keep up to date on coupons and deals.
Join Swagbucks and earn money for searching the internet, answering a Swag poll, and doing other fun things each day.
This video by Gospel for Asia about Christmas has a message that reaches right into the heart and makes us think. |